Die Heizung war die teuerste Einzelkomponente im Gesamten Camper-Bau-Projekt. Das lag nicht zuletzt daran, dass ich a.) eine Diesel-Heizung haben wollte um mir die Gasabnahme zu sparen und um nur eine Energiequelle nachtanken zu müssen und b.) ich die Heizung für Luft und Wasser in ein Gerät integr...
Die Isolierung war der mit Abstand aufwendigste und "fieseligste" Schritt im ganzen Camper Projekt. Nicht nur, dass das Füllen von Sicken und sämtlichen Hinterschneidungen seine Zeit braucht, auch die hohen Kosten für Isoliermaterial (jedenfalls wenn man Armaflex verwendet) sind zu bedenken. Wenn ihr das hier lest, ist es wahrscheinlich zu spät. Aber: Falls ihr noch keinen Van gekauft habt, überlegt euch falls ihr einen Krankenwagen oder Kühlwagen kaufen könnt, ob euch das nicht 1-2000€ mehr wert ist. Vorteil ist nicht nur, dass ihr keine Kältebrücken habt, sondern auch die immense bzw. den i.d.R. rechteckigen Bauraum den ihr dann zur Verfügung habt.
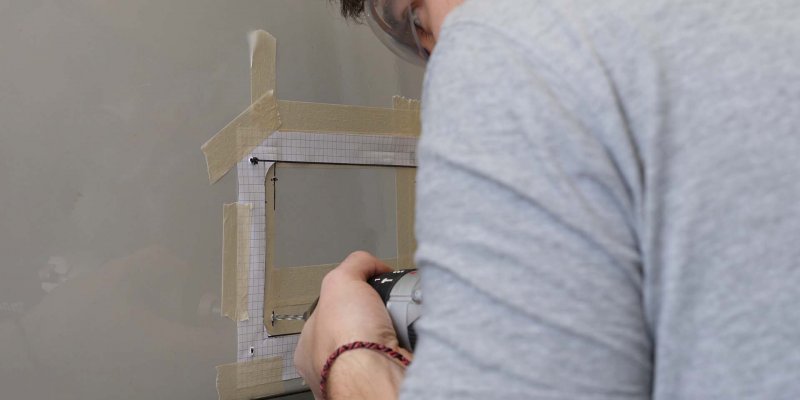
This step actually went much faster than I had hoped: At 8:00 we had an appointment, at 9:00am the tools were unloaded after coffee and at 16:00 we were finished with three roof hatches and a window - and that with minimal collateral damage.
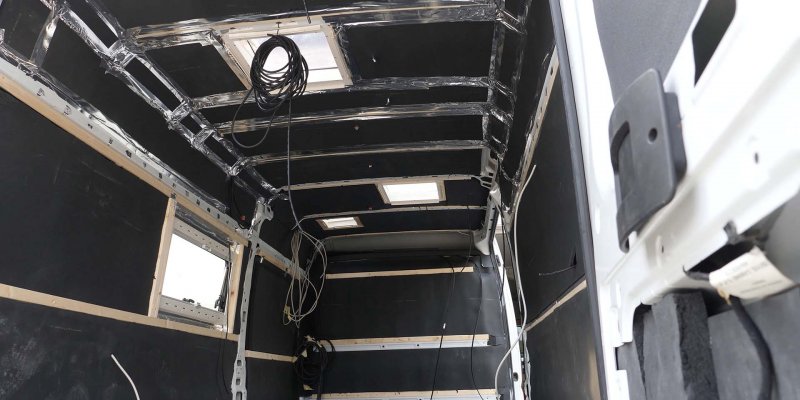
Before the complete interior is covered with insulating material we would like to use the beautifully exposed holes of the numerous structural elements to thread in the cables. This page serves more to provide some basic food for thought - the respective setup depends too much on your van or your connection wishes.
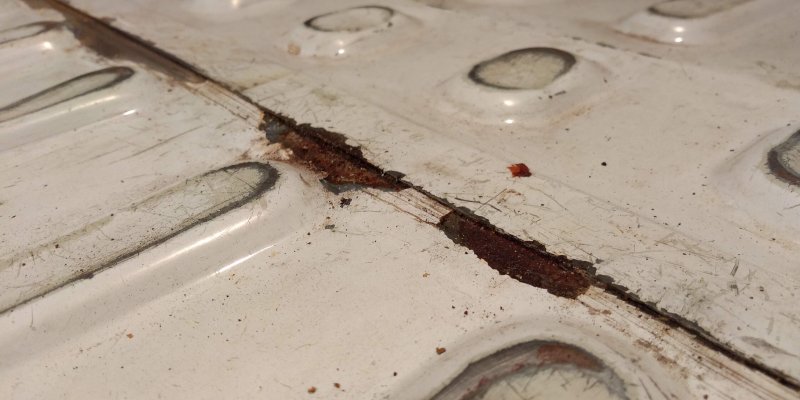
The exterior paint of my van was - for a commercial vehicle - in good condition, but in the hold the paint was already worn off by packages and shoe soles or partially rotten. And all in all quite dirty. Since I didn't want to invest weeks in a van conversion, which then has to be dismantled again because it rustes underneath, it was clear: This has to be fixed first.